
DIY Tips for Installing Brick Pavers: A Step-by-Step Guide
- Sabrena
- Jul 20, 2023
- 5 min read
Brick pavers can add charm and elegance to any outdoor space, whether it's a patio, walkway, or driveway. Installing brick pavers on your own can be a rewarding DIY project that allows you to create a beautiful and durable space. In this step-by-step guide, we will walk you through the process of installing brick pavers, providing you with useful tips and insights to ensure a professional-standard result.
What are brick pavers?
Brick pavers are individual units made of clay or concrete that are designed to interlock with one another. They come in various shapes, sizes, and colours, allowing you to create unique patterns and designs. The interlocking nature of brick pavers provides stability and durability, making them an excellent choice for outdoor surfaces.
Advantages of using brick pavers
Durability
Brick pavers are known for their strength and ability to withstand heavy loads. They can handle vehicular traffic without cracking or deteriorating.
Aesthetic appeal
Brick pavers add a timeless and elegant look to any outdoor space. They come in a wide range of colours and patterns, allowing for endless design possibilities.
Low maintenance
Once installed, brick pavers require minimal maintenance. Regular cleaning and occasional repairs are usually sufficient to keep them in excellent condition.
Easy replacement
If a paver becomes damaged or stained, it can be easily replaced without disturbing the surrounding ones. This makes repairs quick and cost-effective.
Planning and Preparation
Before diving into the installation process, proper planning and preparation are crucial to ensure a successful outcome.
Assessing the area
Start by evaluating the area where you intend to install the brick pavers. Consider the purpose of the space, the expected foot or vehicle traffic, and any existing landscape features. This assessment will help you determine the appropriate size, shape, and design of the pavers, as well as the quantity needed.
Gathering the necessary tools and materials
To install brick pavers, you'll need the following tools and materials:
Shovel or excavator: For digging and removing soil.
Compactor: To compact the base and ensure stability.
Levelling tools: A rake, tamper, or screed board to ensure a level base.
Brick saw or chisel: For cutting bricks to fit around edges or obstacles.
Sand or gravel: To create a stable and level base.
Edging materials: Options include plastic or metal edging to contain the pavers.
Joint sand: To fill the gaps between the bricks and prevent weed growth.
Ensure you have all the necessary tools and materials before you begin the installation process. This will save you time and allow for a smoother workflow.
Preparing the base
Before installing the brick pavers, it's essential to prepare a solid and stable base. Follow these steps:
Mark the area
Use stakes and string to mark the perimeter of the project area. This will provide a clear guide for excavation and installation.
Excavate the area
Remove any existing grass, plants, or debris from the marked area. Excavate the soil to a depth that allows for the pavers, a layer of sand or gravel, and the necessary base thickness. Aim for a depth of about 6-8 inches for pedestrian areas and 8-10 inches for driveways.
Compact the soil
Use a compactor to compact the soil evenly and create a stable base. This step is crucial to prevent settling and ensure a long-lasting installation.
Add a layer of gravel or sand
Place a layer of gravel or coarse sand on top of the compacted soil. This layer provides additional stability and allows for proper drainage.
Level the base
Use a rake, tamper, or screed board to level the gravel or sand layer. Ensure it is even and smooth, taking care to maintain the desired slope for water drainage.
Installing the Brick Pavers
With the base properly prepared, you are now ready to start installing the brick pavers.
Creating a pattern and laying the first row
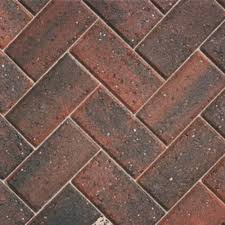
Choose a pattern
Decide on the pattern or design you want to create with the brick pavers. Popular options include herringbone, basket weave, and running bond patterns.
Start at a fixed point
Begin at a fixed point, such as a building's edge or an existing structure. This will serve as a reference for the rest of the installation.
Lay the pavers
Lay the following rows of pavers according to your chosen pattern, aligning them tightly against each other. Ensure they are level and even. Use a rubber mallet or a piece of wood to tap them gently into place.
Cutting bricks to fit
Measure and mark
Measure the spaces where the full-sized pavers won't fit, such as edges or corners. Mark these areas on the pavers that need to be cut.
Cut the bricks
Use a brick saw or a chisel and hammer to cut the bricks along the marked lines. Take safety precautions and follow the manufacturer's instructions when using power tools.
Fit the cut pavers
Place the cut pavers into their designated spaces. Ensure they fit snugly and maintain the desired pattern.
Filling the gaps
Spread joint sand
Once all the pavers are in place, spread joint sand over the entire surface. Use a broom to sweep the sand into the gaps between the bricks.
Compact the pavers
Use a compactor to gently vibrate the entire surface. This helps the sand settle into the gaps and creates a more stable and cohesive surface.
Add more sand and repeat
After compacting, add more joint sand and repeat the compaction process until the gaps are completely filled and the sand is evenly distributed.
Securing the Brick Pavers
To ensure the stability and longevity of your brick paver installation, it's important to secure the pavers in place.
Apply sand or sealant
Once the joints are filled with sand, sweep off any excess and mist the surface with water. This will help the sand settle and bind the pavers together. Alternatively, you can apply a sealant specifically designed for brick pavers. The sealant will further protect the pavers from stains and enhance their durability.
Allow time for curing
Give the sand or sealant enough time to cure according to the manufacturer's instructions before subjecting the pavers to heavy use or vehicular traffic.
Finishing Touches
To complete your brick paver installation, you can consider adding some finishing touches for a polished look.
Edging the paver area
Install edging materials along the perimeter of the paver area to create a clean and defined edge. This will help prevent the pavers from shifting and maintain the integrity of the installation.
Cleaning the bricks
After the installation is complete, clean the surface of the brick pavers using a mild detergent and water. Scrub away any dirt, stains, or debris to restore the natural beauty of the bricks.
Maintenance and Longevity
To ensure the longevity of your brick pavers and keep them looking their best, regular maintenance is essential.
Regular cleaning and inspection
Sweep the surface regularly to remove debris and prevent the buildup of dirt and leaves. Inspect the pavers for any signs of damage or shifting and address any issues promptly.
Repairing damaged pavers
If a paver becomes cracked, broken, or stained beyond repair, remove and replace it with a new one. This will maintain the integrity of the installation and prevent further damage.
Installing brick pavers can be a rewarding DIY project that enhances the beauty and functionality of your outdoor spaces. By following these steps, you can achieve a professional-looking result. Remember to plan and prepare thoroughly, lay the pavers carefully, secure them properly, and perform regular maintenance to ensure the longevity of your installation.
If you need to buy the materials for your brick paving installation, come down to our Crediton yard to see our range of pavers, or get in touch to discuss your project and we’ll be happy to help.


Comments